Friday, October 4, 2019

Pirate chest out of paper tutorial

Hello,

I hope you are having a wonderful day. A while back I made a treasure chest for my altered coins (see my previous post), all out of paper. Below you find a step by step tutorial.


I started out with an Eileen Hull Bigx XL die called Candy Drawer. I used two cuts of the circled part. I taped them together to make a wider box. This is the base I made the chest from.

This is the two parts taped together. As you can see I scored the top, as that needs to have the shape of the lid of the treasure chest. The rest of the scores are done by the die itself.

I am not holding this in quite the right angle, but you get the idea. I looked at how I want the shape to be and traced that and cut the sides out.


I cut the sides and made sure to add tabs for glueing it all together. I covered the "lid" with some weathered leather looking paper from an older TH paper pad. The rest of the chest I will paint black.

Here the box partly put together. One more side to glue, and then the outside can be decorated.

I want to cover the outside with wooden planks. So I stained a piece of watercolor cardstock with tea dye distress stain and embossed it with the 3D Lumber texture fade. This will be the base for making my planks.

I cut quite a few planks with the TH planks die, and also cut trim to size out of grunge board. Those will be the studded parts of the chest.


I used almost all my brows of the Distress ink palette to add depth to my planks. I used my ink blending tools and my fingers. Sometimes fingers are the best tools around ;-)

Apperantly I missed taking pics of how I made the trim. It is pieces of grungeboard that I painted with tarnished brass and antique bronze. Then sanded it a bit and inked it with ground espresso Distress ink. Then added the square brads and glued them over the planks that I already glued on the lid. I added a "lock" so I can close the chest.

I inked up some TH hinges with Mushroom alcohol ink to give them an aged look, and fastened them to the lid with brads.

Just above the lock I stuck a Jolly Roger from Ideaology, after I inked it with Mushroom ink. This completes the pirate look!

I forgot to mention that I cut the lid off from the base, this makes it easier to add the hinges. Here you see the base, with the planks added and the studded trim. 


This is the finished chest after I added two handles and four box corners. They are also inked with mushroom ink to age them.

And here it is, the pirate treasure chest filled with gems and coins. How I made those, I will reveal in the next tutorial ;-)

Thank you so much for stepping by.
Take care and keep your craft on!

Freddie 
xox


Thursday, September 12, 2019

Altered plastic coins

Hello there,

For about 6 weeks now, a "coin goblin" has been leaving plastic coins in fence posts and on stones outside of our property. They keep popping up every now and again. I have been collecting them and wound up with 25 of them now. I decided to alter them to make them look like they were a treasure buried at sea. It is very easy to do and here are the steps I took:

These are some of the coins I am talking about. Regular plastic tokens. 

I rubbed grit paste on various spots of the coins. This will emulate rust. As metal oxidizes in salt water, we need a rusty crusty look. I just put my finger in the jar and smear it on.


As you can see I didn't cover them completely, I do want to see some of the writing and image on the coins. I let them air dry for a couple of hours and then they are ready to be painted.

I covered the surface and the side with tarnished brass distress paint of some of them.

And brushed pewter on the other coins.  They look weathered already, but not rusty enough.

I rubbed some rusty hinge paint on my gold coloured coins...

And black soot paint on my silver ones. This makes them look affected by the sea and time already!

As silver only blackens and rusts a little bit, I only rubbed a little vintage photo distress crayon over it so it gets a hint of rustiness. The gold coins need more work.

I rubbed the gold coin with cracked pistachio distress paint. This will give it an awesome oxidized look! Then a but more tarnished brass and antiqued bronze paint. We don't want to lose all the shimmer. I also used some rusty hinge and cracked pistachio distress crayon and finished it off with vintage photo crayon, just like the silver coin. I distressed some coins more than others to make it look more real.

When you throw them on a pile they look like I dove them up from the sea bed! All I need now is a treasure chest to put them in ;-)


The tutorial on that one will follow soon...

Thank you so much for stepping by.
Take care and....
Keep your craft on :-)

Freddie
xox

Thursday, August 29, 2019

Playing with foil

I'm baaack... my apologies for neglecting my blog.. I totally lacked blog worthy inspiration. But I was asked to do a tutorial on foil, so that is the perfect opportunity to take up blogging again.
I made a Halloween card with a rainbow skull, using foil, and a few fellow crafters asked how I did it. So here it goes:

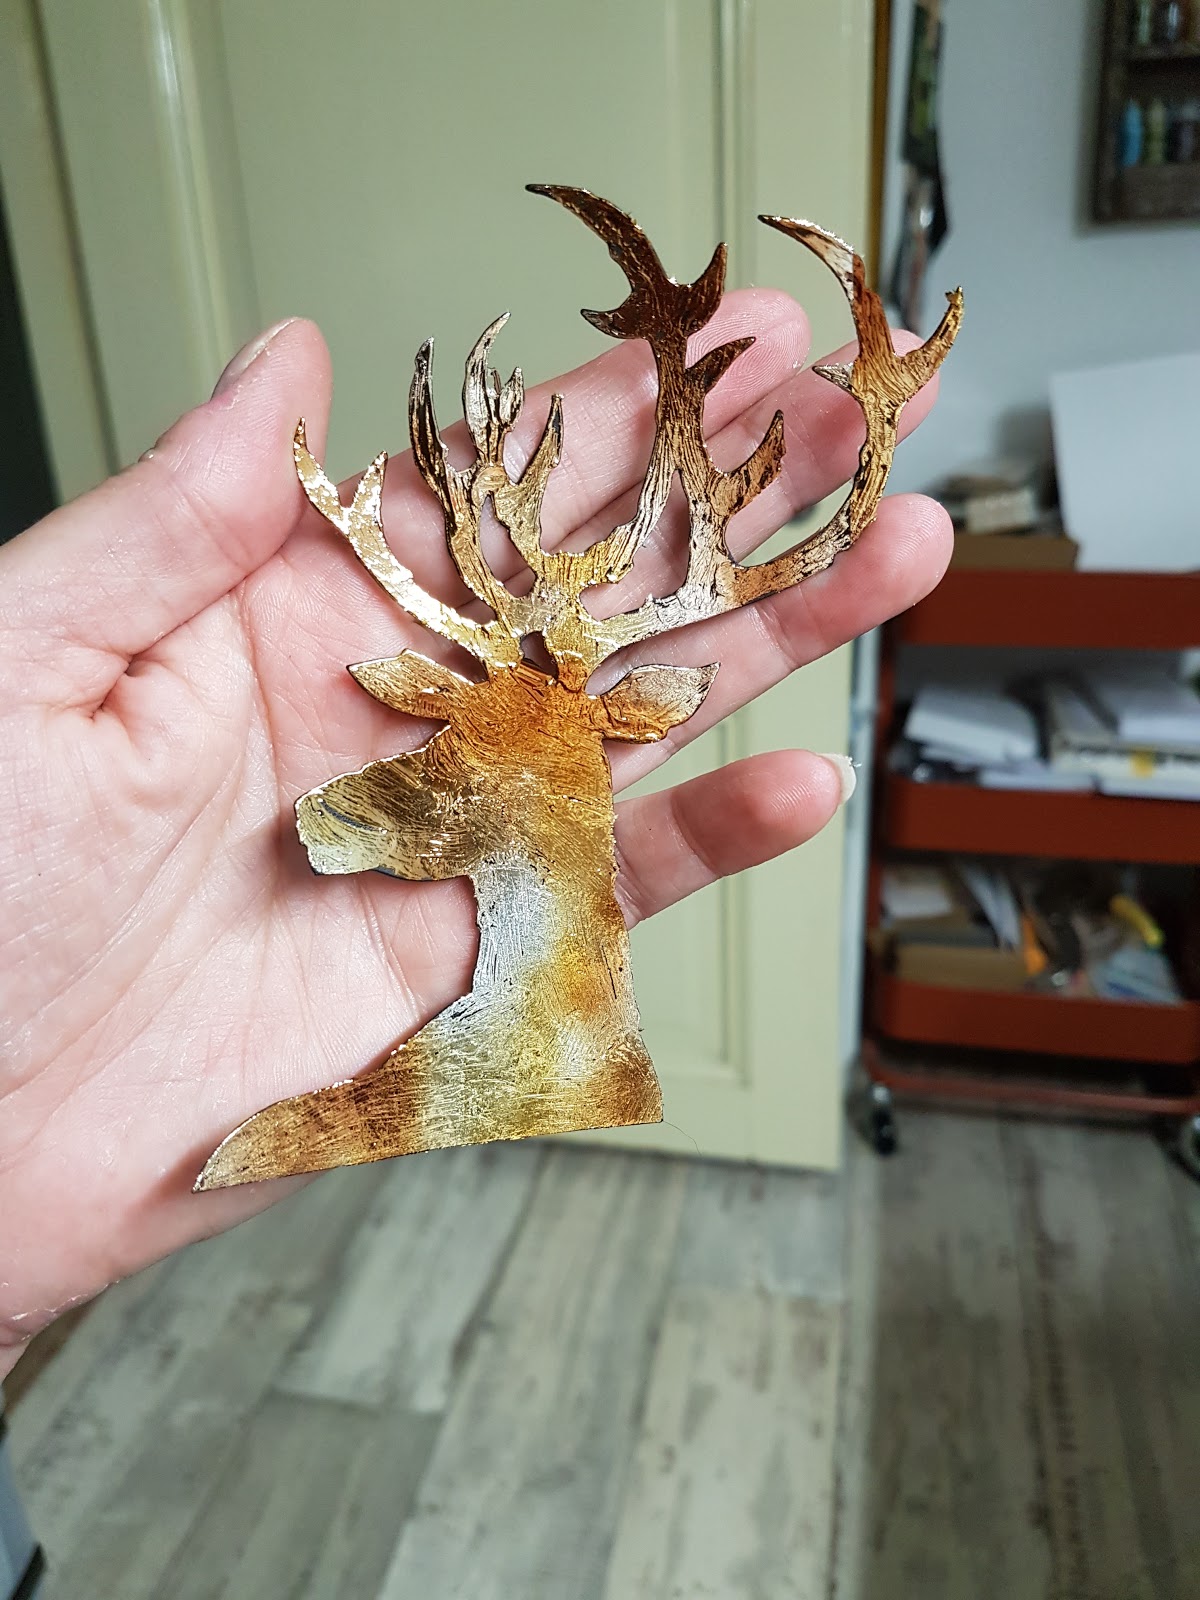
This technique works best if you use big die cuts and black cardstock. I decided to make two more of the skull cards and a dashing deer christmas card. Both dies are by Tim Holtz.

I used a thicker black card stock so the foil will really pop.

This technique only works if you use a glue that stays tacky after it dries. I have used this Tombow glue as it dries very quick and stays super sticky. And I have used 2 in 1 glue pens that stay sticky also for foiling writing or drawn images. I know there are special glues and pastes for foiling, but I am still in the experimenting phase, so I haven't gotten those yet ;-)

You could use a brush, but as this glue dries so quickly, I prefer to use my finger to smear the glue all over my die cuts.

For this skull I am using a rainbow coloured foil. I am also making a skull with an opal foil, that is a bit iridescent, and a gold/brown stag.

You cover the image with the colour side up. I always fold up a paper towel or tissue and rub it over the foil, to press the foil onto the glued surface. There are foiling machines that will give you a perfect foiled finish. I am more of a distress girl, so I prefer this look as it is not that perfect. You can see the streaks you made with your finger and sometimes there are areas where the glue didn't quite get to. But to me that makes it more beautiful ;-)

Here you see all three die cuts with the foils rubbed on. I always leave it for ten minutes just to make sure that the glue is really dry. After that the big reveal... always exciting!!

How colourful is this? I always pull it off quite carefully because when the foil didn't take well, or I missed a spot with rubbing, I can press it down again and rub it some more.

Tadaaaa... the finished rainbow skull.

This is the opal/iridescent one....

And my dashing deer. Yep I think I really like foiling!!
Now I have to turn them into cards :-)


I used the same technique on the die cut words...

And last but not least the dashing deer in golden brown.

Thanks so much for taking the time to read my blog and I hope you got inspired to dabble with some foil, like I did.

Take care and keep your craft on!

Freddie
xox


Friday, February 8, 2019

Fluffy bow tutorial revisited..

I know I know it has been ages since I last posted. Life and the holidays happened and before that I moved my entire craft space into a new room. Anyhooo, as people keep asking how I make my fluffy bows, I decided to do a new tutorial, as the first one dated back to 2014!

To keep it simple and easy to see, I used a blank tag and uncoloured ribbon, I always stain my ribbons to match my projects.

I use Tim Holtz' crinkle ribbon for my ribbons, but as that is discontinued, you can use silk rayon seam binding, available at sewing shops.

My big love is tags, I must admit that I have strayed to cards lately, but still tags are my favourite to work on.

I start by wrapping the ribbon around my hand like this for about 7 times and cut it. I always keep a huge jar on my desk, filled with pre cut pieces of ribbon. That way I just have to reach into my jar, pull a piece out and stain it or stamp on it and use it on my cards or tags.

Thread the ribbon through the hole of the tag and cut a piece off, long enough to tie a simple bow. This is the "cheating" part *wink wink*.

Now wrap the remaining piece of ribbon around your hand again. I always try to keep the ends in the middle of my hand, so you get nice loops. I never mind if the ribbon gets a little twisted, it adds to the fluffiness :-)

Now slide the loops off your hand and put them on the threaded hole of the tag. Next step is tying a ribbon on top of this, with the piece you threaded through the hole of the tag. 

This is how it will look "unfluffed"... 

To fluff your bow just pull the loops apart and it will get nice and fluffy.

For the final touch cut any ends of the ribbon by folding it in half and snip. This will create nice swallow tail ends to your bow.

And now you end up with a luscious fluffy bow adorning your tag. I have another tutorial on how to stain the ribbons and how to put them on cards. Feel free to browse on my blog :-)

Here a small selection of fluffiness lol. I stain my ribbons with distress inks, distress markers or distress inks/oxides. This way your ribbons always match your project.

I hope this was helpful and I look forward to seeing fluffy bows everywhere ♡♡♡♡

Take care and keep your craft on!

Freddie
xox