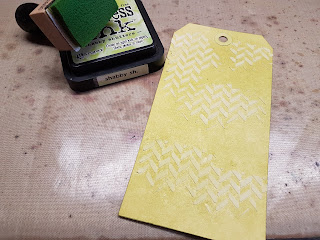
I spread the white embossing paste over parts of the stencil that was on top of my tag. The only downside of playing with embossing paste, is that you have to wait for it to dry. You can use a heat tool, but it will make the embossing paste go all puffy.
After the paste is dry I ink over it with distress ink and an ink blending tool.
I always ink the edges of my tags with walnut stain distress ink. It adds interest and draws the eye to the middle of the tag.
As soon as I saw the colour of the tag develop, I knew I would turn it into a beach themed tag. I stamped the shell, that is an Emerald Creek Craft Supply stamp, with Perfect Medium on black card stock. Then coloured it with various colours of Perfect Pearls, and cut it out. I mounted it and added the stamped sentiment. The brads are also from Emerald Creek as well as
the "pebbles" on the bottom. They are from the Quarry Range.
Here is a closer look of the Perfect Pearl shell and the Quarry stones.
Thank you for stepping by and I hope you visit again :-)
Take care and keep your craft on!
Freddie
xxx


No comments:
Post a Comment